You can add additional banks (cashbooks) in Navigator so they are available for use throughout the system.
Adding a New Bank
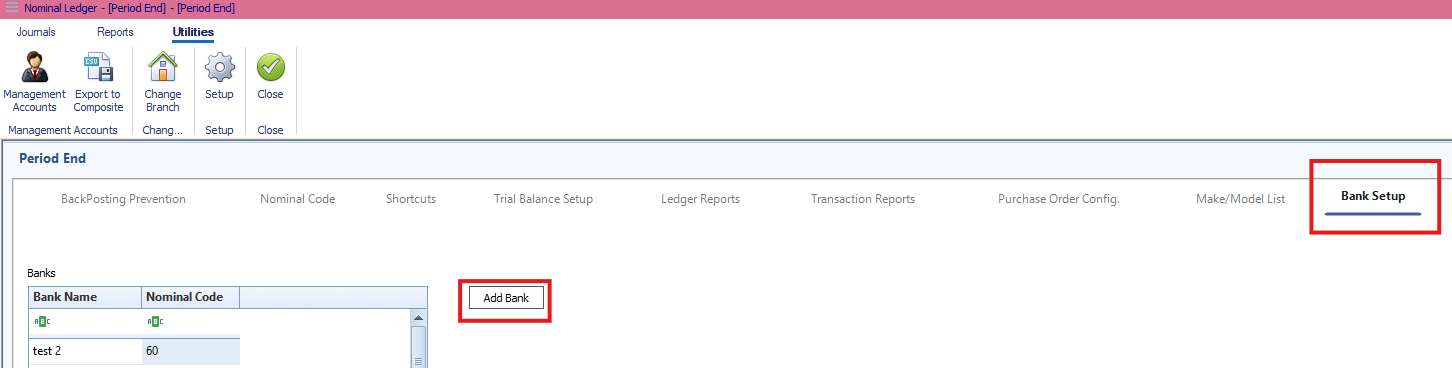
- Navigate to Accounts > Nominal Ledger > Utilities > Setup > Bank Setup.
- Select Add Bank.
- Enter the Bank Name.
- Select the Nominal Codefor the bank.
- The nominal code must be 600 or above.
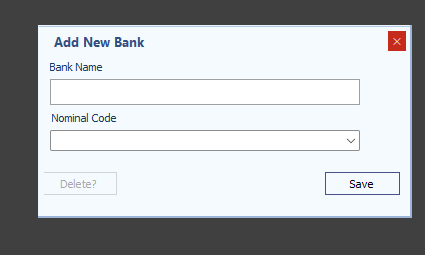
- The nominal code must be 600 or above.
- Select Save.
The new bank will now be available in the Cashbook bank selection list.
Removing a Bank
To delete an existing bank:
- Open Accounts > Nominal Ledger > Utilities > Setup > Bank Setup.
- Double-click the bank you wish to remove.
- Select Delete.
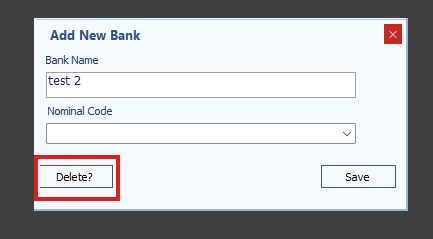
Note: Only remove a bank if you are certain it is no longer required. Historical transactions may still reference the bank.
Important: Nominal Code Setup
Before assigning a nominal code to a bank, ensure it has been configured correctly.
- Navigate to Accounts > Nominal Ledger > Utilities > Setup > Nominal Codes.
- Locate an available nominal code 600 or above.
- Double-click the nominal code to edit it.
- Enter a description that matches the bank name.
- Set the nominal Type to 60 (Bank).
- Save your changes.
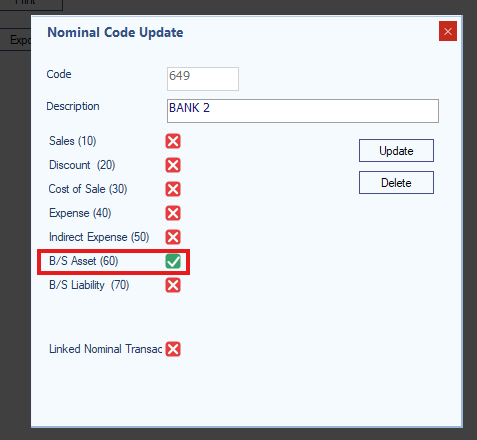
If the nominal code is not configured as Type 60, it cannot be used as a bank nominal.
Best Practice
- Use a unique nominal code for each bank account.
- Keep the bank name and nominal description consistent to make reconciliation easier.
- Confirm the nominal code is configured as Type 60 before creating the bank.
Was this article helpful?
That’s Great!
Thank you for your feedback
Sorry! We couldn't be helpful
Thank you for your feedback
Feedback sent
We appreciate your effort and will try to fix the article