Navigator allows you to record the warranty company against a Workshop invoice and display its name on the printed invoice.
This is particularly useful when invoicing work to a warranty ledger, as it clearly identifies the company responsible for the warranty work.
Step 1: Set the Request Line to Warranty
Open the relevant Workshop job.
Locate the request line being invoiced.
Set the invoice type to Warranty.
Continue with the normal invoicing process.
Step 2: Enter the Warranty Company
From the Create Invoice window, click Invoice.
A Warranty Company pop-up window will appear.
Enter the relevant warranty company name in the Warranty Company field.
Click OK to continue.
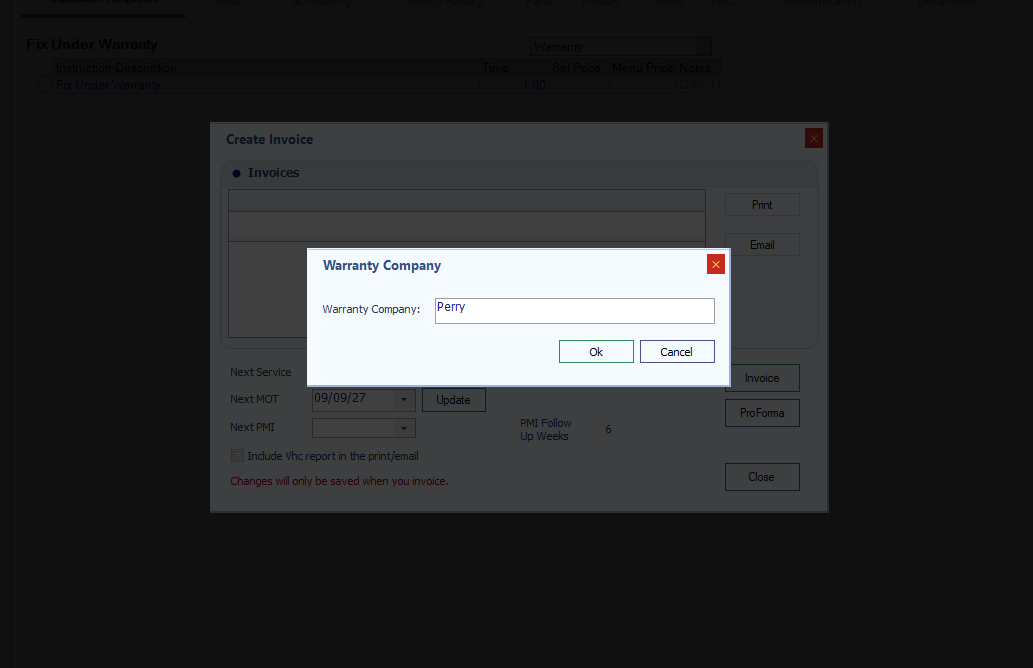
The entered company name can then be displayed on the Workshop invoice, provided the invoice template has been configured to include it.
Step 3: Add the Warranty Company to the Invoice Template
To display the warranty company on the printed invoice, the Workshop invoice template must contain the following variable:
{WarrantyCompany} - the video below details how to add this onto the form.
Open the Workshop invoice template in the invoice designer.
Locate the position where you would like the warranty company name to appear.
Add the variable
{WarrantyCompany}.If required, add a label such as Warranty Company: alongside the variable.
Save the updated template.
Important: The variable must be entered exactly as shown, including the curly brackets.
Step 4: Check the Invoice
Once the template has been updated:
Process a Workshop invoice with a request line set to Warranty.
Enter the warranty company name when prompted.
Preview or print the invoice.
Confirm that the warranty company appears in the correct location.
Benefits
Clearly identifies the warranty company associated with the invoice.
Provides clearer documentation for warranty claims.
Reduces the need to manually add warranty company information to printed invoices.
Improves the information available when reviewing warranty transactions.
Important Information
The Warranty Company prompt appears during invoicing when the request line is set to Warranty.
To display the entered name on the invoice, the {WarrantyCompany} variable must also be present in the Workshop invoice template.
If the variable has not been added, the warranty company name will not be displayed in that location on the printed invoice.
Was this article helpful?
That’s Great!
Thank you for your feedback
Sorry! We couldn't be helpful
Thank you for your feedback
Feedback sent
We appreciate your effort and will try to fix the article